
Bots Switching
Summary
Bots Switching lets one LightVela cloud Agent contain multiple specialized Bots. You can create Bots for research, planning, coding, content, support, or recurring workflows, then switch between them from the Bot avatar bar.
Each Bot has its own workspace context. Depending on whether you create a blank Bot or clone an existing Bot, LightVela applies different inheritance rules to model settings, memory, skills, personality, scheduled tasks, and channel connections.
Before you start
- Sign in to LightVela and open an active cloud Agent.
- To create an additional Bot, make sure your current plan allows another Bot and that no other Bot is still being created or deleted.
- If you plan to connect a channel, prepare the credentials or authorization method required by that channel.
Creating your bot
After signing in with Google or GitHub and activating an available plan, open the Agent console. Complete the first Bot setup: enter a required name, optionally add a description, and adjust its appearance. Select Create and wait for creation and initial configuration to finish. Select Start your journey once configuration finishes, then open Web Chat for that Bot. A messaging channel is optional; available plan model credits or a configured model are required for replies.
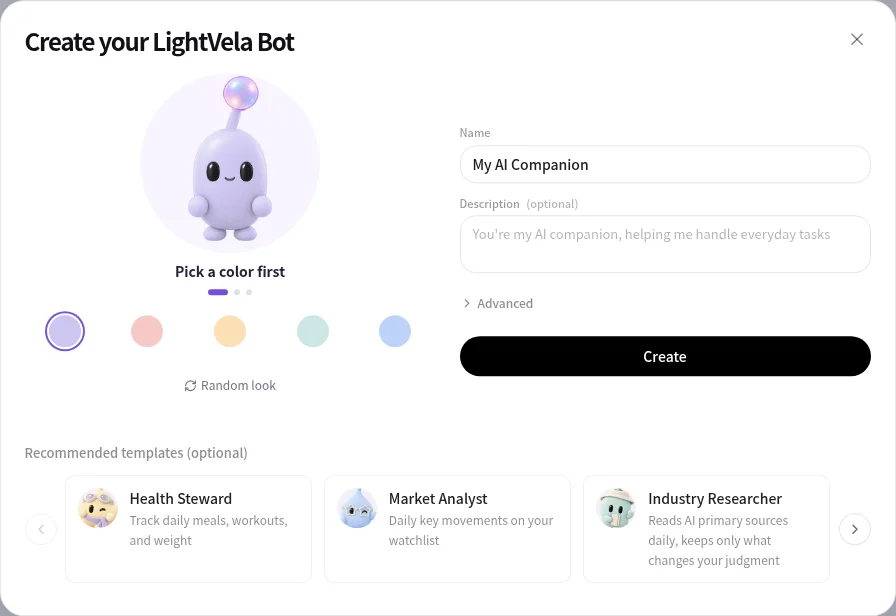
To create another Bot, select New Bot when the entry is available and your plan has capacity. Enter Name (required) and Description (optional), and adjust the appearance if needed. The default is Basic setup. If valid existing Bots can be copied, expand Advanced and select a specific source Bot. To copy the Bot you are using, open Manage Bot → Copy Bot; the creation form preselects that source. Review the source, then select Create and wait for completion.
The close control and advanced copy options are provided only when valid existing copy sources are available. The first setup without a source must be completed. Appearance controls let you change color, shape, and accessories; they do not choose the copy source.
The screenshots below show the current additional-Bot creation form and recommended templates. The close control and Advanced section are available because this Agent already has Bots; this is not the first-Bot setup screen.

Bot workspace and settings
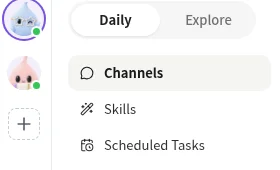
Select the intended Bot’s avatar in the Bot bar. On narrow screens, first expand the navigation panel. Confirm its name before changing models, memory, skills, channels, or scheduled tasks. Web Chat and its conversation list belong to the selected Bot; additional Bots can use Web Chat too. Connecting a messaging channel is not required for Web Chat.
The creation mode determines what the new Bot inherits:
| Creation mode | Inherited | Starts separately |
|---|---|---|
| Basic setup | The primary model and its provider credentials, plus system-provided skills | Backup models, other configured models, personality, memory, skills installed later on the main Bot, channels, and scheduled tasks |
| Copy Bot | Models, personality, skills, user preferences, and long-term memory | Current conversation, previous chat history, scheduled tasks, runtime state, and channel connections |
Review the creation dialog before confirming if you need to keep settings separate. You can then manage each Bot's memory, skills, and scheduled tasks independently.
Why build the Bots independently?
One Bot can handle many tasks, but its context becomes harder to manage as its responsibilities grow. A dedicated researcher, travel planner, financial analyst, or quality checker can keep a more focused set of memories, skills, personality settings, and scheduled tasks.
Independent Bots also make it easier to test a different working style without changing the Bot you already use for another task.

Select the intended Bot’s avatar in the Bot bar. On narrow screens, first expand the navigation panel. Confirm its name before changing models, memory, skills, channels, or scheduled tasks. Web Chat and its conversation list belong to the selected Bot; additional Bots can use Web Chat too. Connecting a messaging channel is not required for Web Chat.
How to use multiple Bots at once
You can connect multiple Bots to supported messaging channels. The available channel combinations depend on the LightVela region:
| LightVela version | Channels that support multiple Bot integration |
|---|---|
| Global version | Telegram, Discord, WeChat, Slack, QQ, WeCom, Lark |
Different Bots on the same instance can connect separate WeChat accounts. Each Bot manages its own WeChat connection. WhatsApp remains limited to one connected Bot per instance; other Bots see an ownership notice and a link to manage that Bot.
Verify a Bot switch or channel connection
After switching or connecting a Bot, check the following:
- The active Bot name and avatar change to the Bot you selected.
- The settings page shows the selected Bot's workspace and configuration.
- A connected channel is listed under the Bot that owns the connection.
- A short test message reaches the intended Bot and returns a reply.
For a group channel, send a test message with the permission level you configured. Confirm whether the Bot can only read the group context or can also reply.
Common issues
| Issue | Likely cause | What to do |
|---|---|---|
| New Bot is unavailable | Your plan has reached its Bot limit, or another Bot is still being created or deleted | Wait for the current operation to finish, delete an unused Bot, or upgrade to a plan with a higher limit |
| A clone option is unavailable | There is no valid current or main Bot to copy | Choose Basic setup, or return to the intended Bot before opening the creation dialog |
| The Bot list is temporarily unavailable | The Agent instance is stopped or the Bot list request failed | Start or refresh the Agent, then reload the Bot settings page |
| A channel is already connected to another Bot | The channel has a single-Bot ownership restriction | Use the notice to open the owning Bot, or disconnect and reconnect the channel according to the channel configuration page |
| A group message receives no reply | The Bot's group permission or channel configuration is incomplete | Review the relevant Telegram, Discord, or other channel configuration page, then send another test message |
Chatting with your Bots in groups
You can invite multiple Bots into supported group chats. Depending on the permission level you set, a Bot may read the group context, reply to user enquiries, or do both.
Group behavior and setup steps vary by platform. Follow the relevant channel configuration page before inviting the Bot, and test the Bot with a direct mention or another platform-supported trigger where required.
Last updated 2026-10-12